Let's Never Talk About Mixing Kick and Bass Again...
The music production world is drowning in kick and bass tutorials. But there's no magic needed - a clean low end is basic science. Here's the 5-step process.
The music production world is drowning in tutorials on this topic. Every day there's a new "magic trick" or tool being uploaded. It makes sense - the biggest fear of dance music producers is that their low end isn't hitting. But there's no magic needed. A clean low end is basic science.
Step 1: Shape the Kick's Length
Before you even think about EQ or sidechain, get the kick's tail right. This is the single biggest factor in whether your kick and bass play nicely together - and most people skip it entirely.
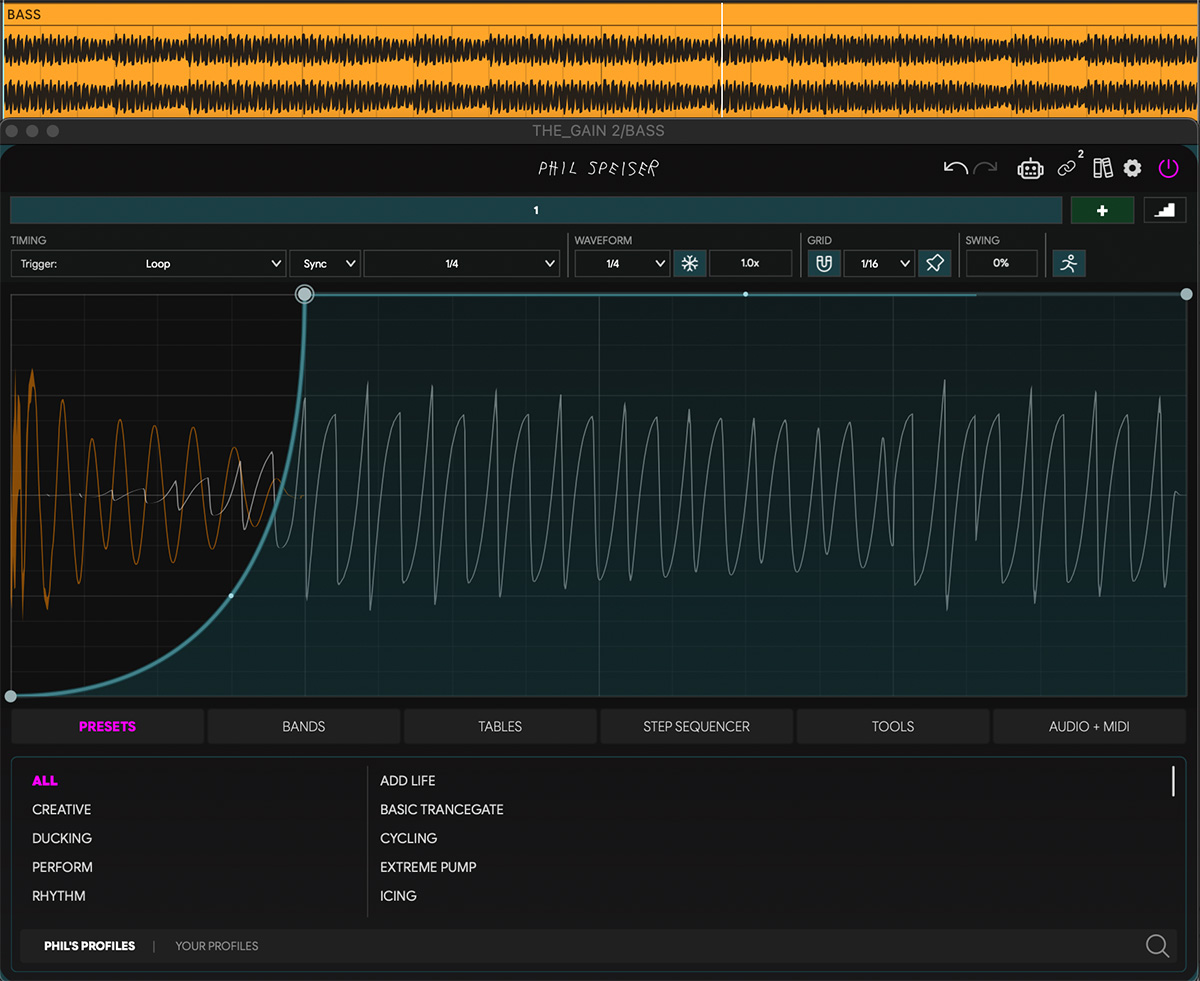
Use THE_GAIN 2 to design the tail and length of your kick. Draw a volume envelope that cuts the sustain exactly where you want it. I usually aim for a 16th note - a quarter of a quarter note - which gives the kick enough body to hit hard without bleeding into the bass's territory.
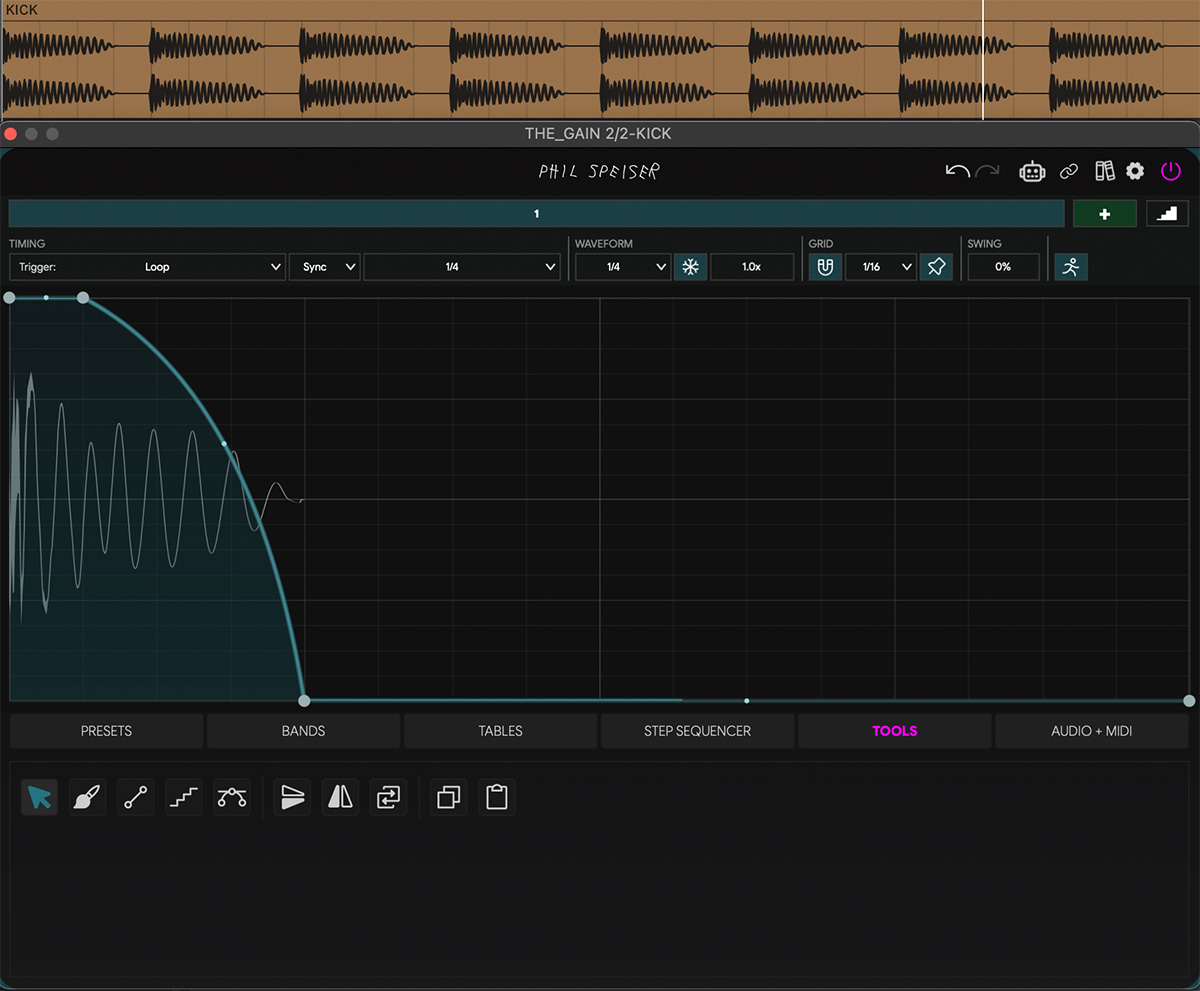
The key here is precision. A compressor squashes the tail - this approach sculpts it. You decide exactly how long the kick rings out, down to the millisecond.
If your kick pattern isn't a straight four-on-the-floor, switch THE_GAIN 2's trigger mode to Self-Oneshot. This way, each time a kick hits, the plugin detects it and runs the volume envelope from the start. No matter how irregular your pattern, every kick gets the same tight, controlled tail.
Step 2: See the Kick Inside the Bass
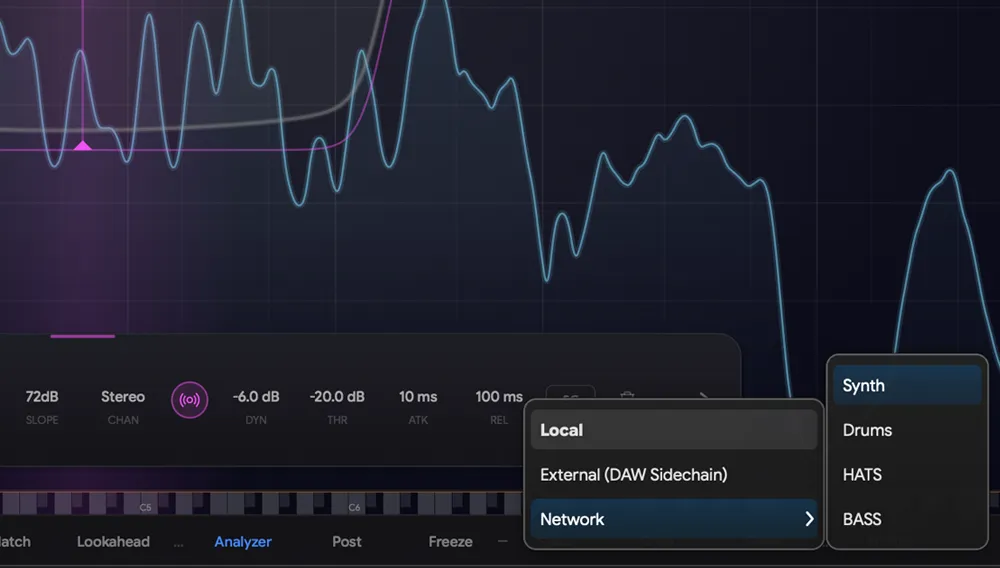
Now add another instance of THE_GAIN 2 - this time on the bass. Set the kick as the sidechain input. Not to affect the sound yet, but to make the kick visible in the oscilloscope.
This is the part most people skip. You can now see exactly where the kick lands inside the bass waveform - the orange transient cutting through the blue. No guessing, no soloing back and forth.
From here, you shape the ducking around the kick in real-time. Every adjustment is sample-accurate. You're not relying on a compressor's attack and release to approximate the right shape - you're drawing it.
Step 3: Fine-Tune the Signal
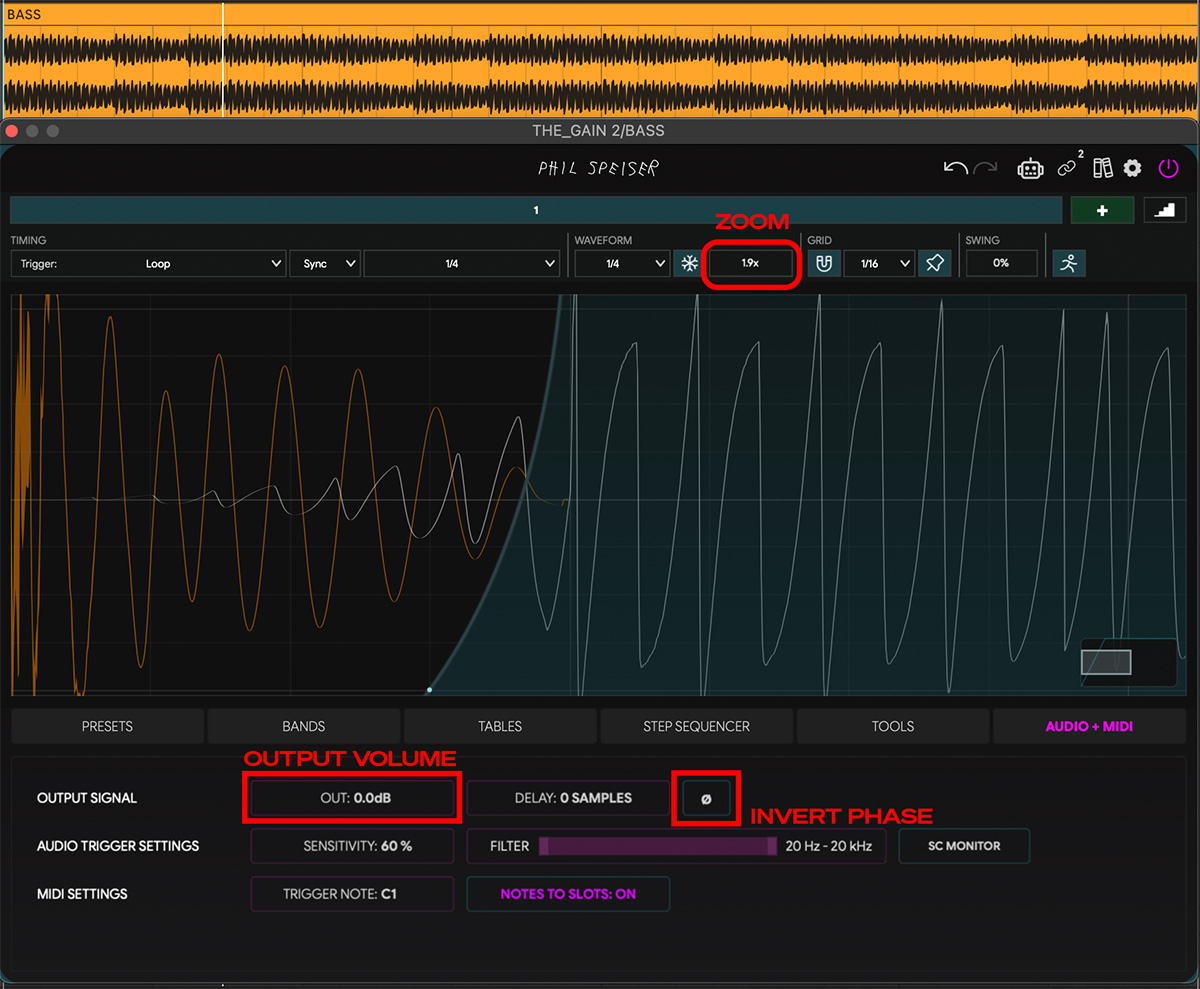
Zoom into the waveform (crank it to around 1.9x or higher) so you can clearly see the phase relationship between the kick and the bass.
Check the Phase
Hit the phase invert button (Ø) to flip the polarity on the bass and compare the two orientations. Look at the oscilloscope: in which version are the kick and bass waveforms moving in the same direction?
Pick the version where they align. Here's why: when two low-frequency signals are in phase, their waveforms push and pull together - they reinforce each other. Your sub gets bigger, tighter, and more powerful. When they're out of phase, they push in opposite directions and cancel each other out. Same kick, same bass, same levels - but the low end falls apart. You lose energy that was always there. A single button click can be the difference between a sub that shakes the room and one that sounds hollow.
Match the Level
Use the OUT slider to adjust the final volume of the bass. Aim for the bass waveform to sit at a height very close to the peak of the kick.
Why? If the kick and bass are roughly equal in amplitude, neither one overpowers the other - they share the low end. If your bass is significantly quieter than the kick, you'll hear a gap between hits where the sub drops out. If it's significantly louder, the kick loses its punch and gets swallowed. Matching them in the oscilloscope gives you a balanced foundation where the kick punches through and the bass fills the space around it.
Step 4: The Creative Choice
This is where it gets personal. You have three directions - and the right one depends entirely on the track.
Option A: The Pump
If you want that classic sidechain pumping effect, go aggressive with the envelope. Set the first quarter of the loop to silence, then draw a smooth transition from zero to full volume over the second quarter. You can even add a short slope back down at the very end for a clean loop. This gives you zero overlap between kick and bass - the bass breathes in and out with every hit. EDM, house, and anything that thrives on rhythmic energy.
Option B: Precision Ducking
If you want something more subtle, shape the curve tightly around the kick. The bass ducks just enough to let the transient through, then fades back in immediately after. No pumping, no audible volume riding - just a clean pocket for the kick to live in. The listener won't hear the ducking. They'll just hear a kick that punches and a bass that's always there.
Option C: Transparent Multiband Ducking
If you don't want any pumping at all - just a clean, steady low end - switch to the Bands view. Add one or two bands and set the crossover frequencies based on where the kick actually lives in the spectrum view.

Now lower the intensity in the higher range(s) so only the frequencies that are actually fighting get ducked. The sub stays untouched, the low-mids get carved - surgical, not destructive.
Use the blue M/S sliders on each band to only duck the mid (mono) part of the bass signal. Here's why this works so well: kick and bass clash almost exclusively in the center of the stereo field. Sub frequencies are mono by nature, and that's where the two signals pile up. The stereo width of your bass - the harmonics, the chorus, the spatial character - lives on the sides. By ducking only the mid channel, you clear the frequency clash exactly where it happens while the bass keeps its full width and presence. It still sounds big and wide. The mono sub just learned to share.
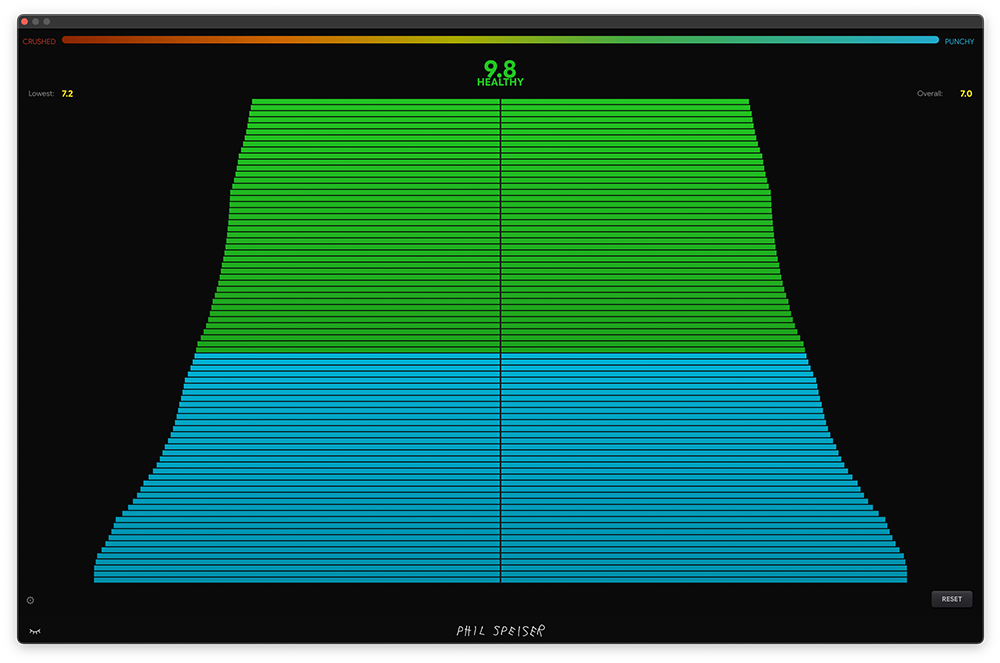
Step 5: Verify on the Master
Put THE_METER on your master bus. Switch the view to oscilloscope and set the sync length to 1 bar.
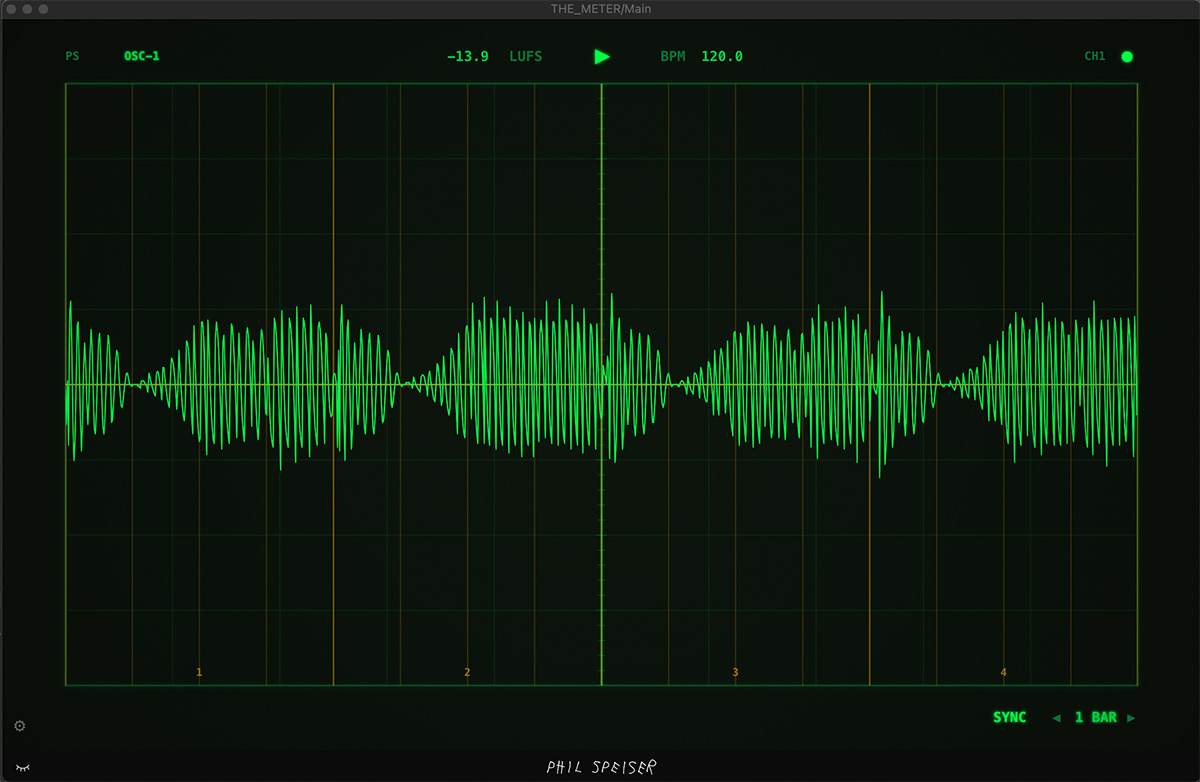
Now you're looking at the kick and the bass together as one combined signal, beat by beat, across an entire bar. What you want to see is a steady, consistent shape - a sausage. The amplitude should stay even throughout the bar. No sudden dips, no spikes that stick out.
If you applied a pumping effect in Step 4, you'll see brief gaps in the waveform where the bass ducks out. That's fine - that's the pump doing its job. Those dips are intentional absence of volume, not a problem to fix. But outside of those dips, the overall level should remain uniform.
If you see an uneven shape - one beat hitting harder, another dropping off - go back and tweak your envelopes. The oscilloscope doesn't lie. When it looks steady, it sounds steady.
That's It. Seriously.
Five steps. No EQ curves to memorize. No "kick gets 60Hz, bass gets 80Hz" rules that fall apart the second you change the sample. No debates.
Shape the kick's length. See the two signals together. Fix the phase. Choose your ducking style. Verify on the master. Done.
The reason this topic never dies isn't because it's hard - it's because people keep looking for a universal rule instead of looking at their actual signals. Once you can see the relationship between your kick and bass, the decisions become obvious.
Now let's never talk about this again.